Getting Started with HelloSIM
Get connected in minutes. Here's everything you need to know to start using your eSIM.
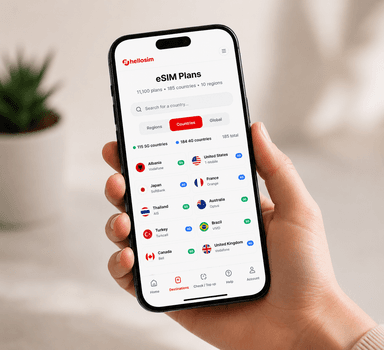
Choose Your Destination
Browse our catalog of 200+ countries and regions. Select the destination you're traveling to and pick a data plan that suits your needs.
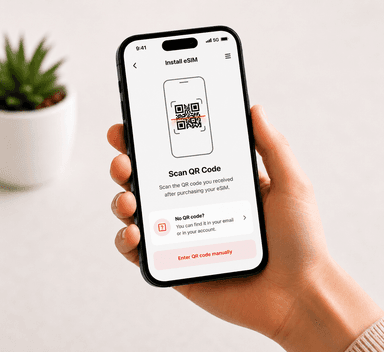
Install Your eSIM
Scan the QR code we provide using your phone's camera or go to Settings > Cellular > Add eSIM. The installation takes less than a minute.
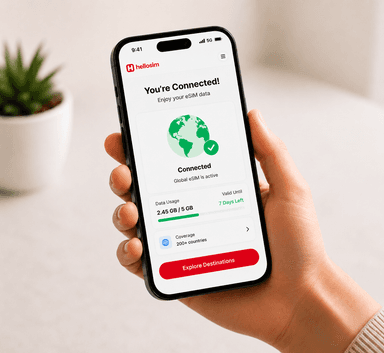
Activate & Connect
When you arrive at your destination, enable the eSIM data plan in your settings. You'll connect to a local network automatically.
Install your eSIM — step by step
Pick your device for detailed installation instructions.
Open Settings
Go to Settings > Cellular (or Mobile Data).
Add eSIM
Tap "Add eSIM" or "Add Cellular Plan".
Scan QR Code
Choose "Use QR Code" and scan the QR code from your email.
Confirm Plan
Review the plan details and tap "Add Cellular Plan".
Label Your Plan
Give it a label like "Travel" or "HelloSIM" for easy identification.
Set as Data Line
When prompted, select the eSIM as your data line or configure it later in Cellular settings.
Before you begin
- Make sure your device is connected to Wi-Fi
- Ensure your device is carrier-unlocked
- Have your QR code ready (check your email)
- Don't delete the eSIM after installation — it may not be reinstallable
Having trouble? View the Troubleshooting Guide →
Helpful Tips
Install before you travel
We recommend installing your eSIM before departure while you still have a stable Wi-Fi connection.
Keep your primary SIM
Your eSIM works alongside your physical SIM. Keep your regular number for calls and texts.
Check compatibility first
Make sure your device is carrier-unlocked and supports eSIM technology before purchasing.
Top up anytime
Running low on data? You can easily top up or buy a new plan from your dashboard.